Plan: - create the main block out in 3DSMax
- build base mesh with sculpting ready topology in 3DSMax
- subdivide in ZBrush and sculpt high poly mesh
- use the Polypaint feature in ZBRush for texturing (with high attention to color theories)
- create a low-poly version with the Decimation Master in ZBrush
- Unwrap the low-poly model with Headus UV Layout
- use XNormal to bake the mesh from the high poly model onto the low poly
The reason behind this workflow is that it allows me insight and practice in game-asset creation (where polygon count and resource management is key) as well as in cinematic/film work (due to the high polygon modeling).
Focus will be on merging the theoretical elements (color, form, silhouette) with the technical ones'.
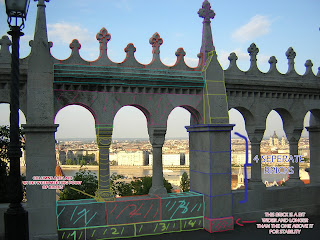
That said, I went ahead and "deconstructed" the reference image so I become more familiar with the structure of this piece of architecture.
I`ve set up the model with proportional topology by setting up Smoothing Groups and using the NURMS subdivision method based on these groups. This way, I can get a pretty high polycount and maintaining the silhouette of the model. If I hadn't used Smoothing Groups, then the model would have curved in at the edges, becoming too smooth.
By using Smoothing Groups I get a high enough polycount so when I subdivide the mesh in ZBrush, the edges will not become too rounded off. I could use the Crease feature, but that takes more time, plus it also will produce crease at unwanted places, thus I would have to "clean up". This method takes too much time and result would be not even as good as with the Smoothing Group method.


No comments:
Post a Comment